Install a Plugin (.nbm file) via Plugin Manager
- Marco Peters
Final versions of plugins should be generally available on the Available Plugins tab of the Plugin Manager and easily installable. In cases you only have a local .nbm file of a plugin, maybe you got a preview version of a new processor or reader, the following steps explain how to install this plugin to your SNAP installation.
Step-by-step guide
| 1. | Start SNAP Desktop. |
|
|---|---|---|
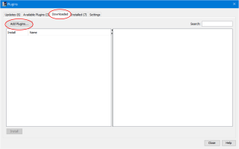
| 2. | Go to the Downloaded tab and click on the button Add Plugins... Find in the now showing file chooser the .nbm file on your local |
|
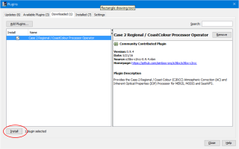
| 3. | The chosen plugin will be shown in the list on the left side and a The plugin is marked for installation by default. Click on the install button to proceed with the installation. |
|
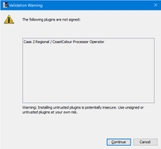
| 4. | During the following installation it might happen that you see a warning |
|
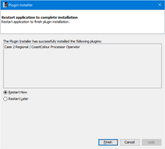
| 5. | At the end you are asked to restart SNAP Desktop. After clicking on Finish SNAP will exit, finalise the installation The plugin is now ready to use. |
|